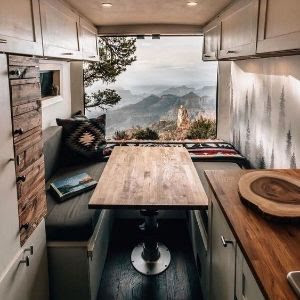
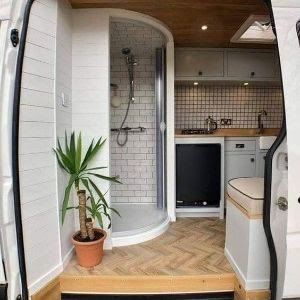
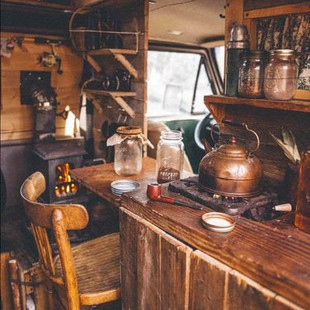
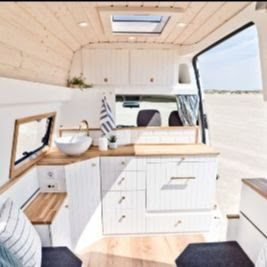
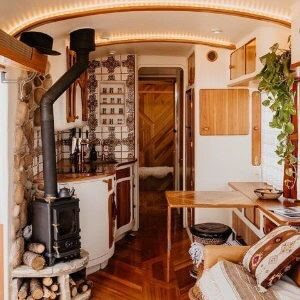
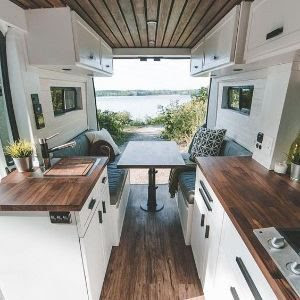
Designing a campervan layout is one of the most fun and important steps of your whole van build. Like Steven Covey discusses in The 7 Habits of Highly Successful People, you should 'begin with the end in mind'. Visualising your design from the outset is going to be the best tool you have to create a beautiful van and give you the motivation to keep going. So unleash your inner architect, let loose the interior designer and get creative. In this article you will find out what to consider before converting your van, you will see some beautiful campervans for inspiration, and I will show you the best ways to design your van on paper and in software.

Index
Shane, the founder of The Van Conversion, is a campervan professional dedicated to helping people transform ordinary vans into homes on wheels. He has authored Roaming Home, and teaches The Van Conversion Course, guiding many people through their van builds. Shane also writes The Van Conversion Newsletter, where he shares practical tips and insights. After completing two van builds and living on the road full-time since 2020, he is passionate about sharing his expertise with others.
This post contains affiliate links, which means that if you click a product link and buy anything from the merchant (Amazon, eBay, etc.) we will receive a commission fee. The price you pay remains the same, affiliate link or not. By using these links, you are helping us to continue writing free educational content. To understand our policies on content, affiliate commissions, and liability, please review our Terms of Use.
Note: Did you know you can get a free electrical wiring diagram by signing up for The Van Conversion Newsletter?
To Cut to The Chase
In this article, we will be going deep on campervan design - from floor plan and layout considerations, to campervan design ideas. If you want to cut right to the chase and you're just looking for camper van design software - I recommend VanSpace3D, which is discussed later in the article.
Note: Before designing your campervan interior you should have decided which van you are going to buy. This is important as the size of your van directly determines how many appliances you can fit, the level of comfort, and the amount of storage space you will have.
The Five Steps of the Van Design and Planning Process
1. Inspiration and Concept Development
Purpose: Define what you want to achieve with your van conversion. Some examples for considerations are: full-time / part-time living, working remotely, travelling with a partner, seasons & geographical location.
Research: Explore various van conversion projects online, on platforms like Pinterest, Instagram, and YouTube. Note down features and designs you find appealing. I also recommend talking with other vanlifers to ask them what they like or what they would change.
Mood Boards: Create a mood board to visualise your ideas. Include color schemes, furniture styles, and layout concepts. Tools like Canva or physical cutouts from magazines can be helpful.
Requirements: Develop a detailed checklist of your must-have features, considering space limitations and usability.
2. Logistics
Budgeting: Estimate costs for the entire project, including the van, materials, tools, and labour. Allocate 30% extra funds for unexpected expenses.
Project planning: Have a rough idea of the project outline. When you start your build I recommend using a Gantt chart and kanban board, but in this ideation stage, all you need is an overall idea. The Van Conversion Dashboard has all of your project management tools set up and ready to go. I recommend you check it out.
3. Initial Sketches and Layout Designs
Hand-drawn Sketches: Start with rough sketches on paper. Outline different layout possibilities, considering the van’s dimensions. I recommend using Google’s “Crazy-8” design process for quick ideation (we will discuss this technique later).
Basic Floor Plan: Draw a basic floor plan to scale, noting where each feature will go (e.g., bed, kitchen, storage). Scales of 1:5 or 1:20 are normally used for metric, whereas 1:4 and 1:24 are used for imperial.
Blueprints: If you feel like going a step further, you could draw the blueprints of your van. This will include a plan, front and side elevation - like the image shown below. To help you with this, I’ve put together a pack of van blueprints for you! Download 30 free van blueprints here.
4. Technical Drawings and CAD
CAD Software: Use CAD software like SketchUp or Vanspace3D to create precise 3D models of your van’s interior. This helps in visualising the space and making adjustments easily. I personally like Vanspace as I can quickly iterate through ideas with its drag and drop functionality.
Materials: Make sure you consider the depth of materials you are using. For example, insulation plus panelling can easily take 5-10 cm away on each side.
Schematics: Create your wiring, water system, and gas system diagrams.
5. Feedback
Community and Experts: Share your plans with experienced van converters through forums or social media groups. Get feedback and suggestions.
Professional Advice: Consult with professionals for technical aspects like electrics and gas systems to ensure safety and compliance with regulations.
Iterate and Improve: Make necessary changes based on feedback. Finalize your design with all the components accurately placed.
Eleven Things to Consider Before Designing your Campervan Layout
You must consider carefully what your campervan will be used for and what your goals are before starting your design as it will dramatically impact how you furnish it. Let's check out some of the main points to be aware of before hopping into the design:
1. Working from the van
I work remotely from my campervan. Having a comfortable workspace is absolutely key to me as my days often stretch longer than the usual 9-5. If you're like me and work remotely, or even have the desire to work remotely, you definitely need to install a workstation (ie. a comfortable table). I installed a living area that seats 6 people, so there is plenty of room to work from.
Fold down standing desks can also be a great addition to your van; I use standing desks all the time when I'm home or in an office and find they are great for your mood, productivity, and even fitness.

2. Weather & Seasons
If you're going to be travelling to cold or wet places you will likely be spending a bunch of time inside the van. Your van will want to be a pretty comfortable camper if this is the case, with room to move around and stand up inside. Though on good days you may be happy to cook outside the van, when the weather turns south, your cooking station will need to be inside the van.

If you are travelling to very cold locations you will need to insulate your van very well on the floor, roof, and sides which will detract from the room inside your van. Make sure to consider this when taking your initial measurements. If you are planning on travelling to very warm locations you may need to install two fans in the roof, you should account for this in the design. If you are travelling to moderate or cold locations you will most definitely need a heater and should account for storage space for a heater and gas cylinder.
3. Where you will be travelling
Will you be spending a lot of time in cities or are you a mountain-dweller? The answer to that question might determine the style of van you build. If you are going to spend time in populated locations you may want a stealthy van (ie. it just looks like a builder's van). This means no awning, no art-work on the van, and the use of flexible (thin film) solar panels rather than rigid ones (they are hidden from sight).
4. Budget
This is the single biggest factor in determining how you kit out your van. A budget of €1,000 will yield you a very different van than a budget of €10,000. If you're on the cheaper end, then you probably won't be able to install a heated shower, compostable toilet, or home cinema. But that's okay. You can still build an amazing campervan. As a general rule of thumb, smaller vans will be a little cheaper to build than bigger vans (less space to work with). You can learn all about van conversion costs in this article.

5. Travelling with a partner, family, or friends
If you are travelling with your partner, you will need a double bed. Plain and simple. Even the solo-vagabonder should consider this (there's always the possibility of meeting someone on the road - ‘I live in a van’ is a great chat-up line after all). If friends or family might occasionally be joining you, you may also want to carry along a spare tent or have some extra sleeping room inside the van. Some people choose to install hammock hooks in their van.
6. Lifestyle
If you are an outdoorsy person and do a lot of running, skiing, mountain-biking, or other sweaty activities you may want to install a shower in your van. A proper shower installation can be expensive and tricky, but for some vanlifers, it's an absolute essential. Adding a shower will also require more water storage capacity which takes up valuable space. If you are going to be lugging around a load of outdoor gear, you will also need somewhere to store it. A garage or large storage chests will be necessary.
7. Dress-sense
If you have a ton of clothes (which if you're doing vanlife you shouldn't), you will need a big wardrobe. If you like freshly-ironed shirts, you will need a place to hang them. If you are a nudist, well, you needn’t worry so much.
8. Bowels
Though in the real world your bowel motions are a bit taboo to talk about, on the road you're going to have to get used to it. Yes, even with your partner. I personally would not be without the chemical toilet in my van. If you have IBS, I would say it's an absolute necessity - who knows when nature might call.
9. Books
Bookworm? Me too. I would suggest taking your favourites and leaving the rest. Get a Kindle. Think about where you will store your books and where the best place for a book shelf will be. The Kindle is one of my top 5 campervan essentials.
10. Food
If you are happy living on jam and toast then you may not need too much food storage space. However for most people this is not the case. I personally have two shelves filled with spices, a pantry, and a 50 litre fridge. Think about where you will store your food before the fact. You should also think about the size of fridge you need - what kind of food do you eat? If you don’t fancy a fridge, make sure you keep perishables on a low shelf in your van (heat rises). You would be surprised how long things last if they are kept low down in your van.
11. Mood
Prone to the blues? Add more light to your van. You could add more side windows, paint the interior white, add more lighting, or you could add a skylight.
Rent a Van First!
If you're new to vanlife and don't really know what you'll need, renting a campervan and taking it for a test drive can be an excellent way to determine what you absolutely need, and what you can live without. I would suggest renting a campervan for a week and taking it on a wild adventure. Get muddy, do lots of cooking, push the camper and yourself to the limits, and you will determine which supplies you need.
In particular, I recommend using Outdoorsy for your campervan rental. It's basically AirBnb for campervans. They make it incredibly easy to get your hands on a beautiful van and kick off your next adventure.
Outdoorsy is a community of 200,000+ travelers and owners across 11 countries worldwide. 93% of all bookings gave a 5-star review.
In Europe, campervan rental is usually €100-150 per day, in North America it can vary between $80-$300 per day.

Twelve Beautiful Campervans Design Ideas
Humans are idea recyclers. Creativity is borrowed and new ideas are inspired and built upon previous work done by others. Don't expect inspiration to just come to you, you need to actively seek it. Before you start designing your van you should do lots of research into other beautiful builds that exist out there. Go on Instagram or Pinterest and start researching. Make sure you save your favourite builds so you can replicate the best parts.
Here are twelve of my favourites vans to give you some campervan design ideas:
And here's my van, Beans:
I have a long wheelbase, high roof Ford Transit (L3H3) that has stood to me wonderfully. It has 400W of solar power, a split charger, shore power, running water, an LPG heater, a large fridge and kitchen area, a comfy bed and large wardrobe, an adjustable height table, a roof fan, and a sink and stove. It even has a home cinema with a projector and pull-down projector screen. It's turned out beautifully and is a great travel companion.

Make a Supplies List
Most countries will require your campervan to have at least seats and a table, sleeping accommodation, cooking facilities, and storage facilities. Other things to be aware of might be the location of the gas bottle and fan, the height of the roof, the number of windows required, and if an awning is required.
I suggest writing a list of all the requirements you have for your conversion. What do you want, what can you live without? How much space will it all take up? Having a clear idea in your head about what you want in your van will give you an indication of the type of van you need to build. You can use “The Van Conversion Map” below as the basis for your checklist. You might also want to check out the van conversion supplies list for the complete list.

Exterior modifications
☐ Awning
☐ Spare wheel carrier
☐ Exterior ladder
☐ Roof rack
☐ Window(s)
☐ Roof vent
☐ Bike rack
☐ Solar panels
☐ Reversing camera
☐ Skylight
☐ Under-mounted water tanks
☐ Air conditioning unit
☐ Exterior hatch for cassette toilet
☐ Flares (for additional space)
☐ Bull bars
☐ Side steps
☐ Front and rear bumper guards
☐ Additional exterior lighting
☐ Tow hitch and trailer hook-up
Electrics
Insulation and Soundproofing
Kitchen
Entertainment and Comfort
Bathroom
Heating and Cooling
Furniture and Interior Features
Water System
Storage Solutions
That’s a big and extensive list. You do not need everything on that list. I made it purely to help get the creative juices flowing.
I’ve put together a free printable PDF of that checklist for you - it is probably easier than looking at the checklist in an email on a computer screen.
Measure Your Van
Once you've bought your van the first step is to go out and take some measurements of it. Take measurements of the floor, walls, and roof in different places, taking note of any odd shapes or curvatures. While these measurements don't have to be perfect, they should be accurate enough and get the proportions are close as possible to allow you to design your van on paper.

Ergonomics and Space Optimization for Campervans
Optimizing the ergonomics of your campervan ensures comfort and efficiency in small spaces. From counter heights to storage access, using proper dimensions can prevent strain and maximize functionality.
Here are some guidelines:
Kitchen and Counter Heights
Counter Height: Aim for 90 cm (35.5 inches), the recommended height for comfortable food preparation.
Counter Depth: A depth of 60 cm (24 inches) is optimal, allowing ample workspace.
Overhead Shelves: Place shelves 1 meter (39 inches) above counters for easy access. Avoid lower shelves that obscure the worktop.
Storage Dimensions
Max Shelf Height: Keep shelving within 1.6 meters (63 inches), which aligns with average eye level for ease of access.
Overhead Locker Depth: Limit depth to 30 cm (12 inches) so you can reach the back without excessive stretching.
Crouching Space: Allow at least 1 meter (39 inches) in front of low cupboards for comfortable access.
Bed Dimensions
Bed Height: Keep the bed 45-60 cm (17-24 inches) off the floor, making it easy to get in and out while providing storage space underneath.
Bed Length: Ensure your bed is at least 190 cm (75 inches) long to accommodate an average adult and insulation requirements.
Seating and Table Heights
Seat Height: Keep seating around 40-45 cm (16-18 inches), similar to standard dining chairs for comfort.
Table Height: Optimal table height for working or eating is between 70-75 cm (28-30 inches).
Walkway Width
Maintain a walkway width of at least 60-70 cm (24-28 inches) to ensure ease of movement inside the van, even with a fully furnished layout.
Design the Layout
Now that you've taken your measurements, you will have a good idea of the proportions and size you will have to work with. The next step is to design the interior layout.
The first draft of your van will be on paper. In fact, you should probably do your first few designs on paper. First do rough designs on blank paper, then do more precise versions on graph paper.
Crazy-8s
A great way to iterate through designs and get the creative juices flowing is by using crazy-8's, a design technique used by Google in order to decide on the design of a webpage. Essentially, you will want to fold an A4 piece of paper in half 3 times so you have 8 sections. In each section draw a different design concept. At the end, pick your favourite. As luck would have it, each section will be roughly campervan proportions.

When you are designing the layout of the van there are a few big things you should be aware of:
Account for insulation / cladding
You will probably be installing insulation and cladding/ply on the floor, roof, and walls. Subtract from your measurements as necessary. I used 5cm polyiso foam insulation board with 1 cm wood cladding on top, so I needed to subtract at least 6cm from my measurements on all sides.
Sleeping widthways
The bed is the most important and space-consuming thing in your van. Make sure you allow the appropriate room for it. Horizontal sleeping can be tricky in many vans, especially if you have it well insulated. Some people choose to leave cutout wells in the walls for your feet and head in order to extend the bed length. Others install body flares on the side of the van which increase the width. Personally, I sleep lengthwise and have a bed extender I pull out at night.

Regulations
Don't forget to keep legal and safety requirements in mind from the outset. This differs from country to country. Things to consider might include the location of the gas bottle, the amount of room you leave the fridge for ventilation, and keeping electrical appliances away from gas.
Weight
You should also consider weight distribution inside your van. You want to keep weight even and low inside. Poor weight distribution affects fuel efficiency and adds more wear-and-tear to your van, decreasing its life expectancy.
Camper Van Design Software
After you have designed your van on paper, the next step is to design it in camper van design software. This isn't 100% necessary but I found it definitely helped me visualise my build and nail down some more precise measurements.
The two best resources to digitally design your campervan are SketchUp and Vanspace 3D. I designed my van before Vanspace was a thing, so I used Sketchup, the simple architectural software originally created by Google. It worked okay and was pretty easy to use.

Vanspace 3D
If I were to do the project again I would definitely use Vanspace 3D as it is purpose-built camper van design software, with pre-built layouts for pretty much every type of van and has awesome drag n' drop functionality. Vanspace makes it easy to bring your van design ideas to life.
Here's a video on how to build out a van design using VanSpace:
Test the Layout
After you have designed your van and are happy with how it looks, it's time to see how it works in real life. Grab a roll of painter's/masking tape and head out to your van. Per your design measurements, lay down the tape on the ground to match when your interior objects such as the fridge, bed, wardrobe, and storage will go. Leave the tape stuck to the ground during your build as a reference.
If you have already bought your supplies, you can bring them out to the van and place them inside in order to further visualise how everything will piece together. Some people build cardboard or plyboard mockups of their interior to help them with this process.

Don't forget to subscribe to The Van Conversion Newsletter for everything you need to get started with your own van conversion (we'll send you a free wiring diagram when you join).
If you're looking for some guidance with your van conversion, you might be interested in our book Roaming Home, or in our online course The Van Conversion Mastery Course. You'll learn directly from our founder Shane how to convert a van into your dream home - no prior experience needed.
Until next time.


